Thursday, 31 July 2014

The Walls are up!

Wow, it's been a month already. I didn't realize so much time had passed! The weather has definitely been a factor in the building progress, starting with frequent downpours at the beginning of the month. I would spend a good part of each day cleaning up after the rain in the morning and tarping everything up again at the end of the day. What a pain.

Then Mother Nature decided to turn on the light switch and for the last three weeks it's been sun sun sun! With the sun however, comes the heat, so I can only work on the tiny house for a couple of hours in the morning (I'm not a morning person LOL) stopping until almost 5 pm when the shadows from the trees provide some much needed relief. Which is why I'm working on this blog entry in the middle of the day - way too hot to work in the sun! I had to take the tarp off to put the top 'plate' on the walls and it was stifling under it anyways.

So here is a photo journey of the build so far.


Can you spot the glaring error here?


The elevated area that juts out is where the head of the bed will sit. It will be built on a platform (like a Captain's bed on steroids) with loads of storage space underneath.


 Way up on a ladder


Hello down there!


Finally, the front wall is sheathed. I'm standing at the kitchen window.


The rest is almost sheathed, I'll cut out the windows when I'm done.


The large opening on the right is for a set of French doors I got on sale at Home Depot. Nice.


Standing inside the 'living room' area with a sofabed I just scored for $25!


Me in my living room, come on in!


Tuesday, 24 June 2014

The floor is done! (almost)


After a quick trip to Kelowna to meet up with my sister Anne, it was back to building. First step was the framing for the subfloor using 2x4's on 16" centers. This was done in three sections. I flipped the direction of the joists on the tail section after reading that it would be stronger that way. Time will tell if that was the right decision. It was also very frustrating at times trying to drive 3 1/2" screws into the wood even using an impact driver (my favorite tool!) and pre-drilling holes on the corners. Something to do with hand & eye coordination that will hopefully improve with practice!


While this was going on, a special order arrived. A beautiful glass bowl for the bathroom sink. It will sit upon a live edge maple plank that will be used as the counter.


Then came the flashing. I started with a 50 foot roll of 36" wide galvanized steel. Boy, was that heavy! So after using that on the first section, I switched to aluminum for the mid-section over the axles and the tail section - it's so much easier to cut and handle. We flipped the frames over to attach the flashing and then bolted each section to the steel frame of the trailer. Then the insulation was put in (the super easy part). I was going to use the Styrofoam insulation but the Roxul was much cheaper and much more environmentally sensitive.


Finally it was time to complete the subfloor by laying down tongue & groove plywood sheets. Things got pretty slow last week though, between news of a friends death, a chicken keeling over with an apparent heart attack and then to top it off, my Bichon got so sick I really thought she was going to die too. So that's why this post was delayed. So the subfloor is almost done, just a few more sheets to glue and screw down - once I figure out why nothing is lining up evenly in the last section - next post!


Monday, 26 May 2014

Prepping the trailer is done

I spent another couple of days painting the trailer with black Rustoleum paint and then David wired it for brake lights. It's a bonus when your boyfriend is also a mechanic! 


There's still the emergency brake-away kit to install but that can wait for the time being.

In the meantime, I downloaded a free program called Floorplanner.com and was able to work out a decent floorplan in record time. I've also downloaded Sketchup from Google but I really don't have the patience right now to spend time learning another program. Floorplanner was super easy.

So here is the layout for my tiny house!
Tomorrow I'm off for a few days to Kelowna BC to meet up with my sister Anne. I plan to stock up on some Okanagan wine! When I get back it will be time to start building the subfloor. Stay tuned! 

Monday, 19 May 2014

Hello and Welcome

Thank you for stopping by, sit down and stay awhile and I'll tell you a story about my tiny house build since I moved to British Columbia. Salt Spring Island that is, ah paradise; oceans, big cedar trees, bald eagles and salmon. I don't remember what got me onto the idea of building a tiny house for myself, but once I did, I was hooked. I've always been fascinated by 'alternative' dwellings such as strawbale, stacked cordwood  and adobe construction. To me a tiny house means freedom; freedom from want, freedom from need, freedom to choose how and where to live. And since I'm in my mid-fifties with no building experience, I figure it's now or never!

Trailer Trash

The first step (after lots of reading, research and ridiculously high quotes for a custom trailer) was to find a suitable trailer to build on. An ad for a gutted travel trailer showed up on the local island network for $200. I went to see it and found this:


The insides were ripped out already but still a mess, no matter, it was all going to be trashed anyways.

So I bought it, had it towed to the build site and then the destruction began! All of this would not have been possible without the help and guidance of someone very dear to me, my boyfriend David. With his invaluable help, we were able to demolish the trailer in about three days and with three trips to the dump for another $180. David taught me how to use a SawsAll, I was in charge of sorting and recycling whatever possible.


The holding tanks exposed. The grey water tank was repurposed into a veggie bed!


What a mess!


The stripped frame before sanding with a wire brush and the welding added. That's Dou, my adopted Bichon, helping me.


Then came some welding to strengthen the frame and add more places to attach the subfloor to the frame. It's looking a lot better with a primer of rust paint.


In the meantime, I had an opportunity to tour another tiny house on the island. I believe this is the Cypress model from Tumbleweed Homes.


Vivian, the owner, had this built for her at a cost of $21,000 for labour, still a bargain compared to the cost of a house!


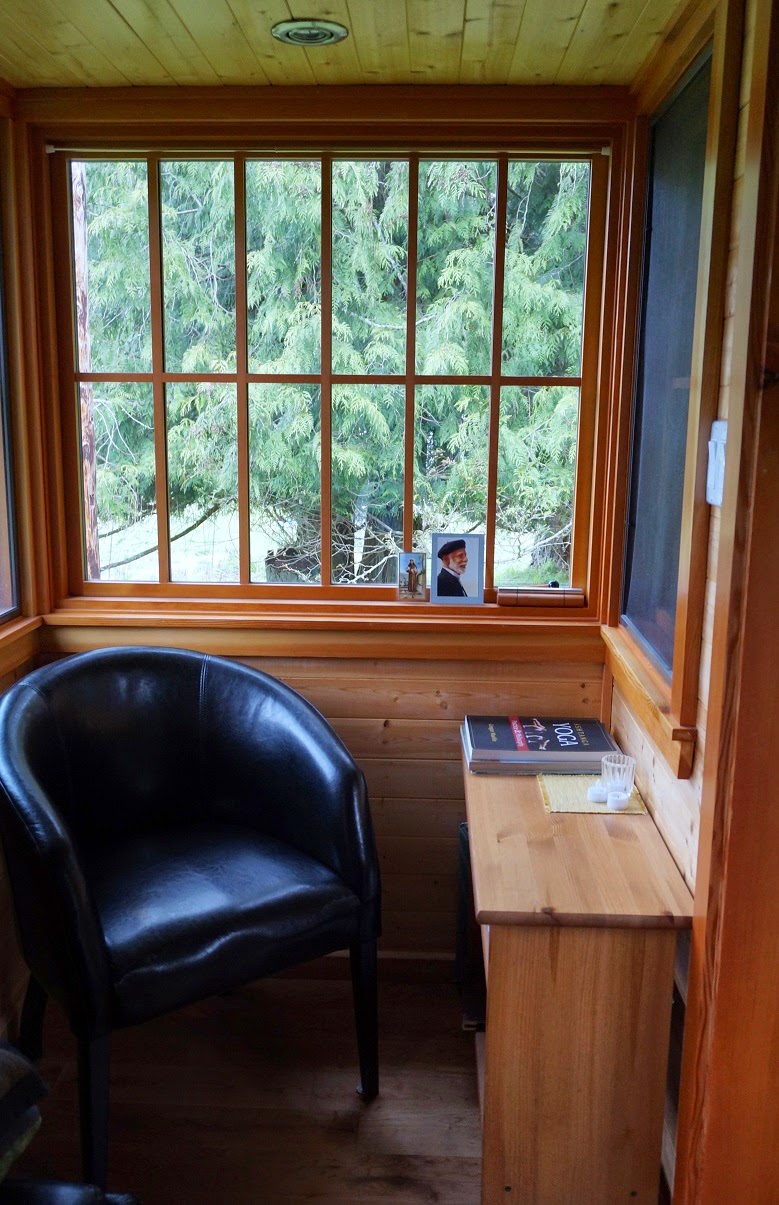
A cozy reading nook in the front 'parlour'.


 Another tiny house enthusiast demonstrating the width of the living space!


A view from the front looking towards the back. The sleeping loft is above with a bathroom and closet space to the side.


In the kitchen. The mini fridge is located under the propane stovetop.


Snug sleeping loft.


My next post should be soon with the trailer prep finished and the framing of the subfloor begins!